Object Removal is an AI-powered online image editor designed to effortlessly remove unwanted objects from photos. This service employs algorithms to analyze images—users simply upload a photo, draw around the area to be removed with their mouse, and the AI swiftly and accurately identifies the selection. Image processing takes just seconds, producing remarkably natural-looking results without requiring any manual editing. Even better, this service is completely free! You can use it freely without registration or login, with no hidden fees and no watermarks added to your images.
According to the Object Removal website, this service can swiftly remove any object from photos, including people, cars, products, pets, plants, clutter, text, labels, or entire backgrounds. However, it currently processes only one photo at a time and lacks batch editing functionality. It supports both JPG and PNG image formats.
After uploading your image, adjust the brush size and Inpaint Strength in the Object Removal editor. Use your mouse to paint over the area you want removed, then click Clear. The AI will automatically recognize and process the image.
Regarding the security and privacy concerns that matter most to everyone, Object Removal employs the HTTPS secure encryption protocol to safeguard user uploads. Processed photos are retained for only 24 hours before being automatically deleted from servers. The service guarantees all data remains secure and will not be used for any other commercial purposes.
I've also introduced several image editing tools similar to Object Removal, such as:
Pixelcut Magic Eraser effortlessly removes unwanted people, objects, or text from photos
ImgCleaner simplifies image editing by easily removing unnecessary subjects or items
SnapEdit clears people or objects from photos using AI to automatically identify removable targets
jpgRM uses an AI magic eraser to wipe away unwanted parts of photos
Next, let's demonstrate how Object Removal actually works and how to use it.
User Guide
STEP 1
After opening the Object Removal website, click “Upload an Image” to select the image you want to process, or simply drag and drop the image onto the webpage. Supported formats include JPG, PNG, and JPEG. Additionally, the feature introduction section at the bottom of the webpage provides usage scenarios and image examples, allowing you to preview the amazing processing results of Object Removal.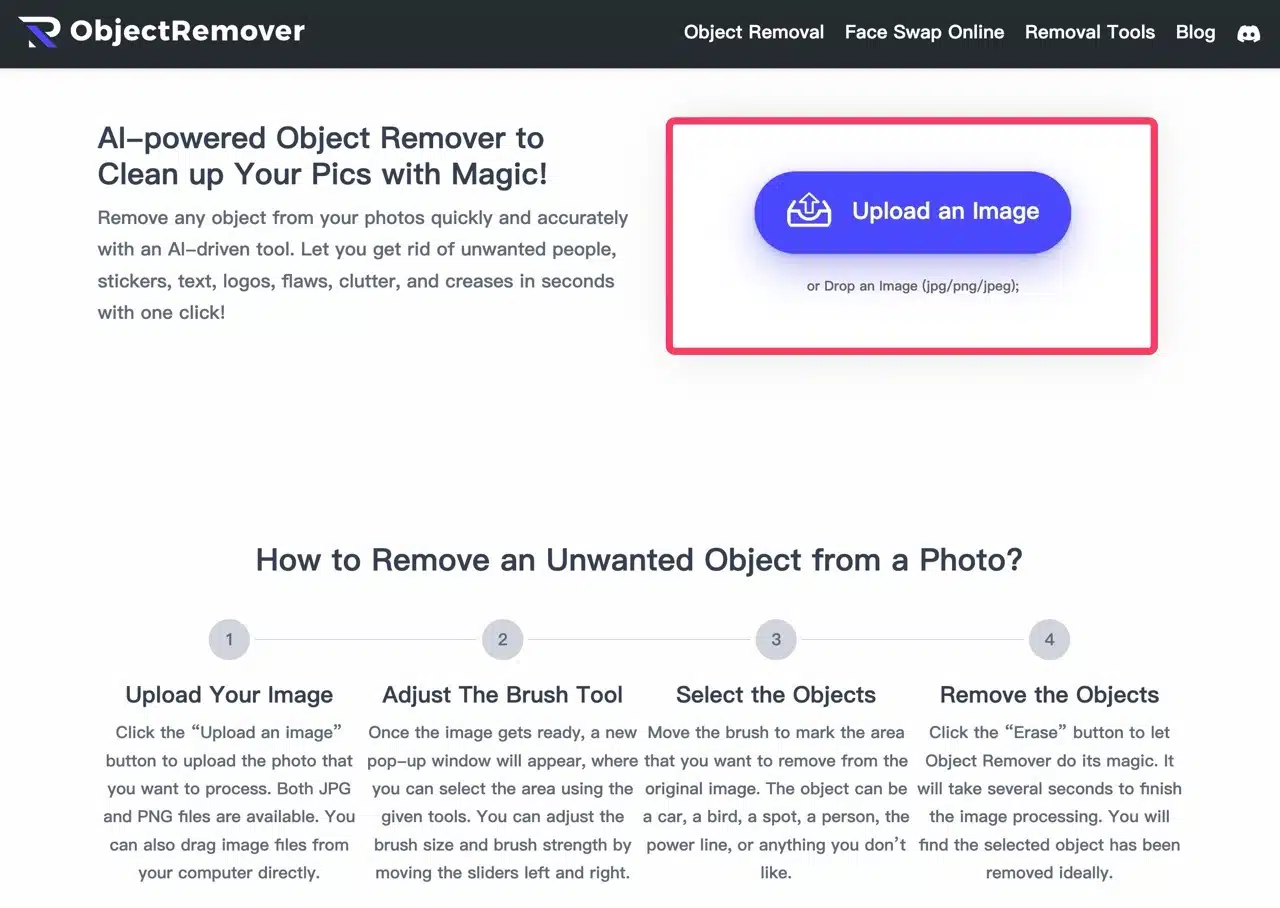
STEP 2
Below, I'll use an image from “Pixabay—a free stock photo, vector, and illustration library with over 300,000 images for commercial use” as an example. After uploading it, adjust the brush size and repair intensity using the editor on the right.
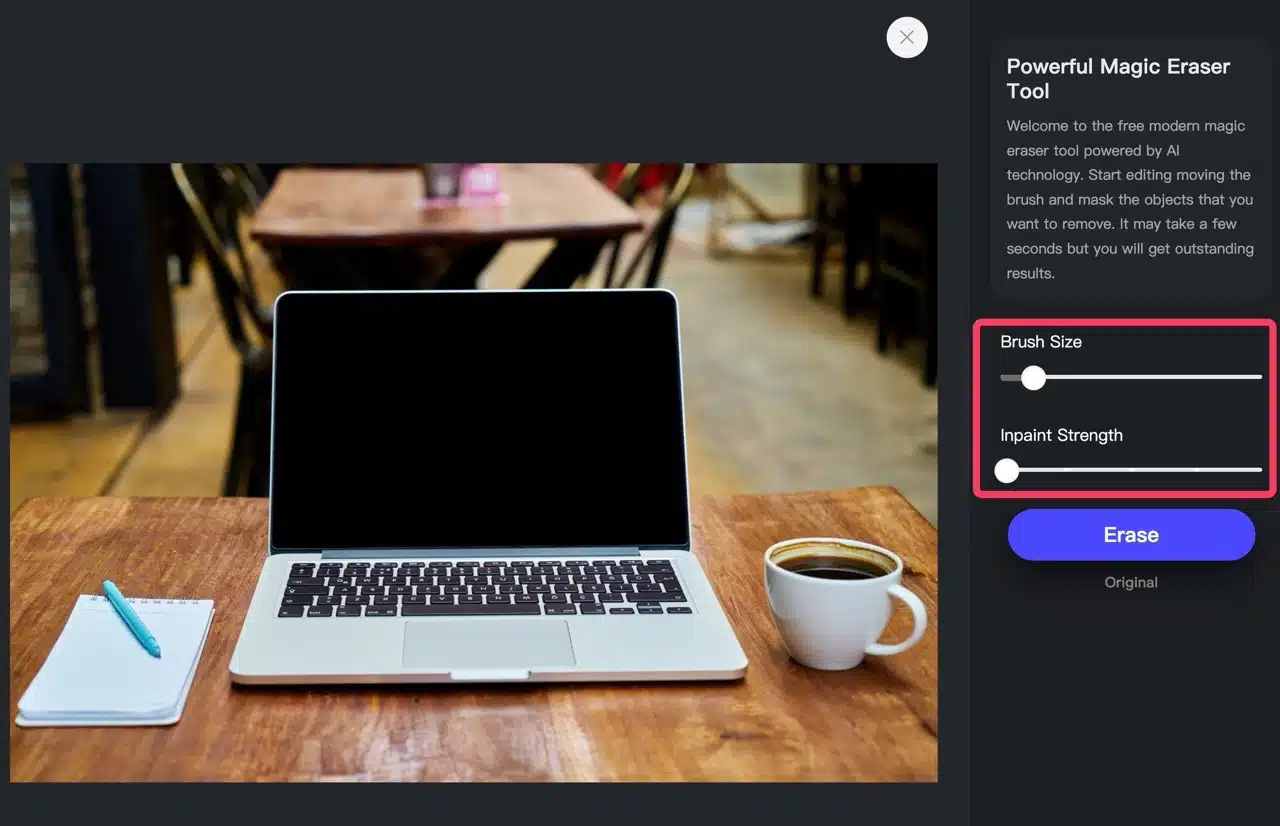
Next, use the brush tool to paint over the area of the object you want to remove in the left image. For example, in my example, I'm removing the pen placed on the notebook.
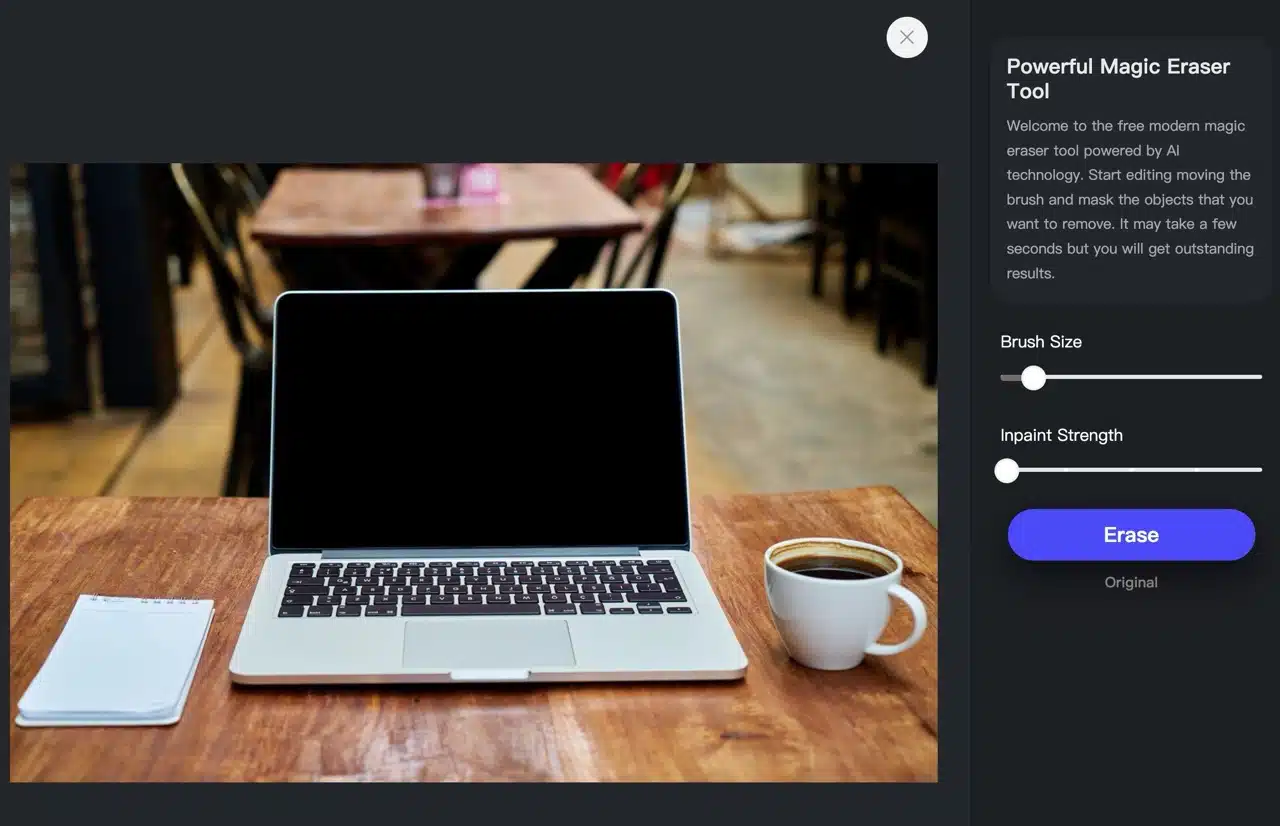
STEP 3
After painting over the object you want to remove, click “Erase” on the right to initiate the AI algorithm analysis and cleanup. This process may take some time to complete.

Once complete, the original object will vanish! The background color is intelligently restored to maintain a natural appearance, as if the object never existed.
STEP 4
Repeat the above steps to remove additional objects. Next, select the notebook on the desk for removal. Adjust the brush size and fill the area to be cleared.
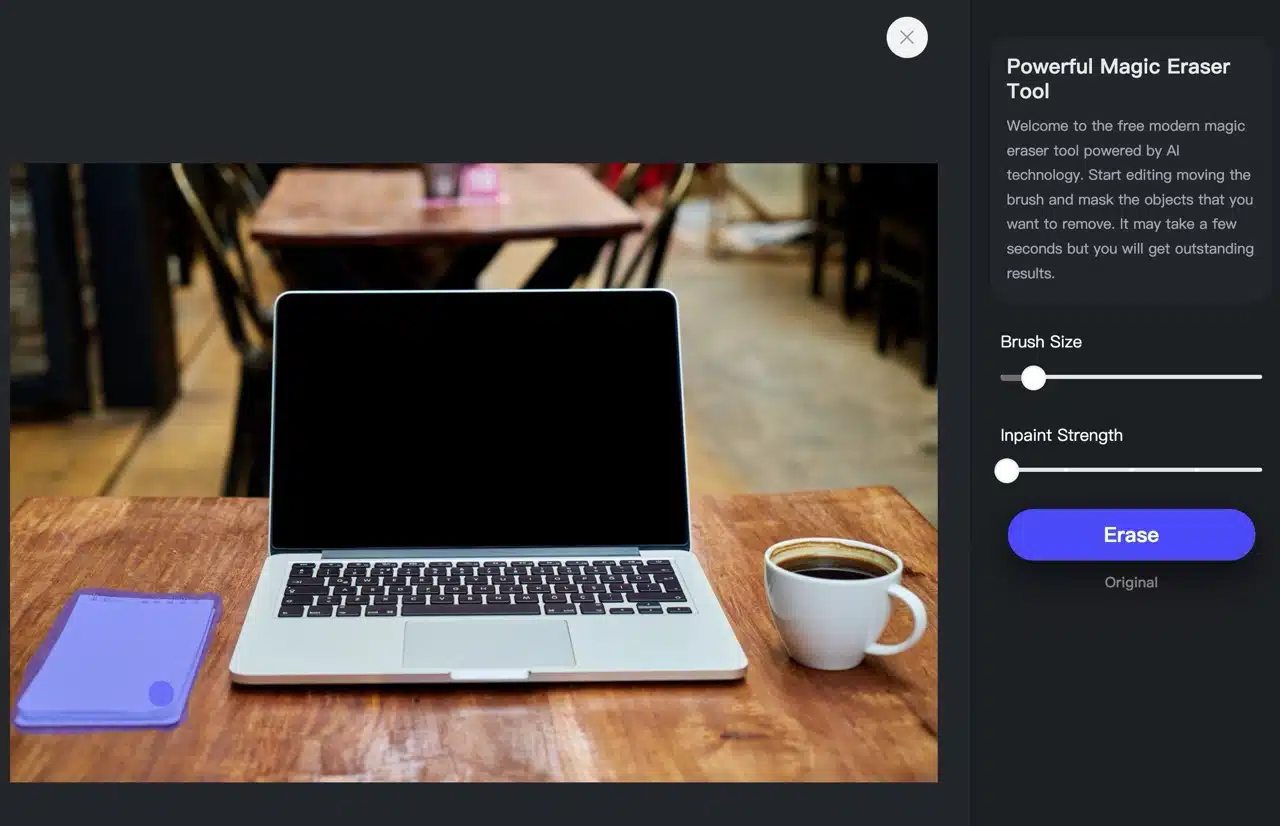
After clicking Erase and waiting a few seconds, the notebook truly vanishes. However, since the original object's area was larger, the processed area may appear slightly noticeable with a hint of blurring.

STEP 5
Finally, click “Download” in the bottom-right corner to save the image. This tool is free to use, though image size is limited to 2K resolution.